Are you facing router coverage issues at your place? Or do you want to extend the home network so that you don’t have to get an extra internet plan for your current work-from-home setup? You probably searched on the internet to resolve this issue and see connecting a secondary router to the primary one as a solution. But you don’t know how to actually do so?
Wirelessly connected routers can be as efficient as the ones paired in the form of access points, provided you know how to set up and configure them to make the most of the ISP-provided internet plans.
Not just that, a wireless connection between routers helps:
- Save Cable
- Eliminate physical constraints during renovation
Table of Contents
How To Wirelessly Connect Two Routers?
Connecting two routers, albeit wirelessly, isn’t as difficult as it seems. In the subsequent sections, we talk about 4 targeted techniques for connecting two routers wirelessly, depending on the type of home or office network that you are dealing with.
Method 1: Router-to-Router
A router-router wireless connection is more like using the secondary device as a bridge. However, setting up the same in a step-pronged manner is expected to help understand other forms of wireless router connections.
Step 1: As mentioned, check the router compatibility, to begin with. You can head over to the network settings of the connected router by accessing the computer and changing the IP address to make it compatible with the primary network.
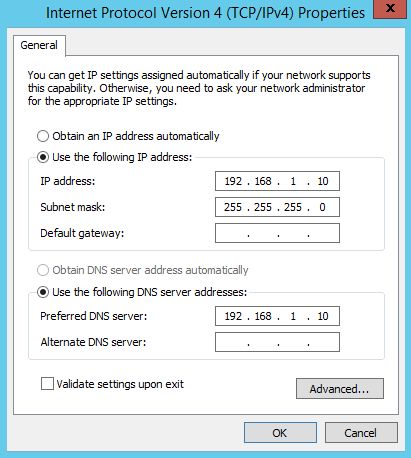
Step 2: If the router is compatible, move forward with the setup and ensure that both the routers are placed close to each other, simply for the sake of accessibility.
Step 3: Start configuring the primary router by connecting it to the modem, directly. You can connect one port to the modem and the other to the computer, for configuring the same.
Note: For MacBooks, you can use the Thunderbolt 3 port for the same and in case your Windows laptop doesn’t have an Ethernet port, opt for the Ethernet-USB adapter for getting the job done.
Step 4: While configuring the router, do not think about the secondary one. Instead, access the router interface by typing the concerned IP address in the existing web browser.
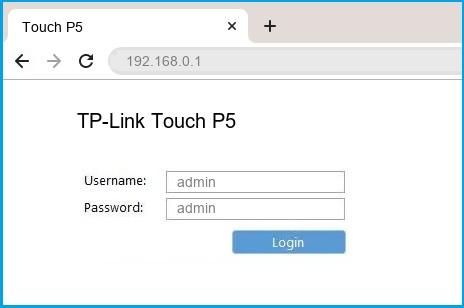
Note: The router settings are anything but uniform and you must check the model to ensure seamless configuration
Step 5: Next, you need to connect the secondary router to the computer and start configuring the same as per requirements. However, you need not connect the same to the modem.
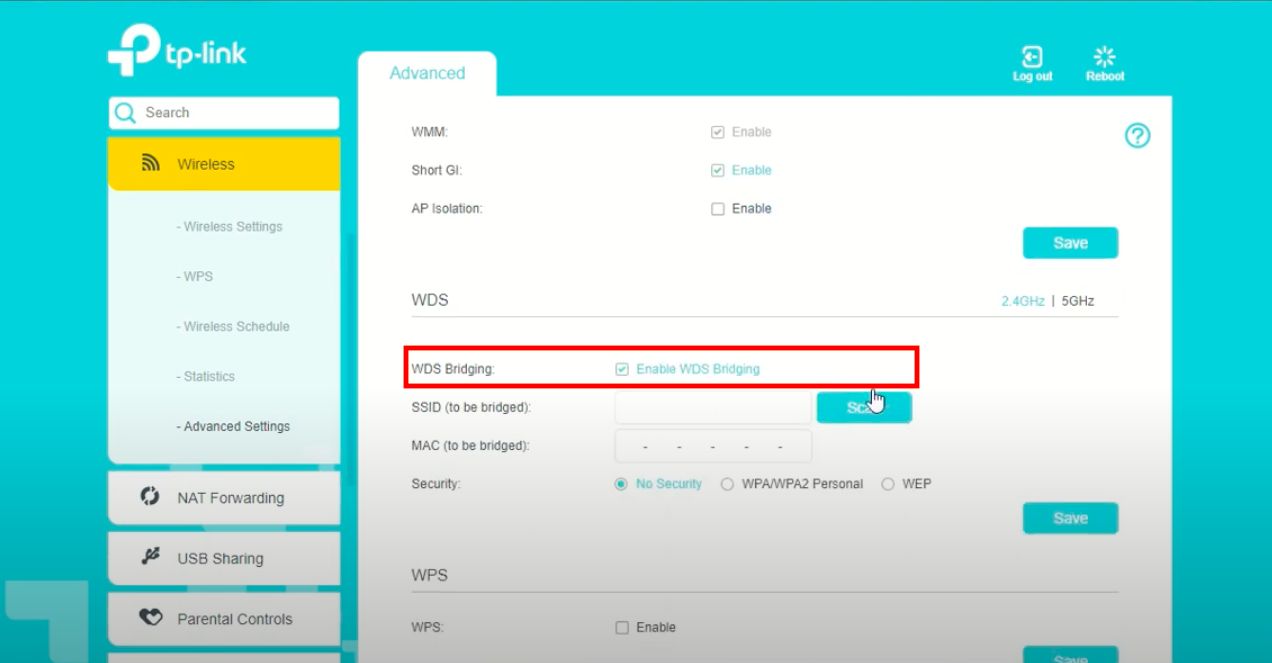
Step 6: Once the secondary router is connected, open the configuration page and search for the Wireless setup tab to make changes for each band.
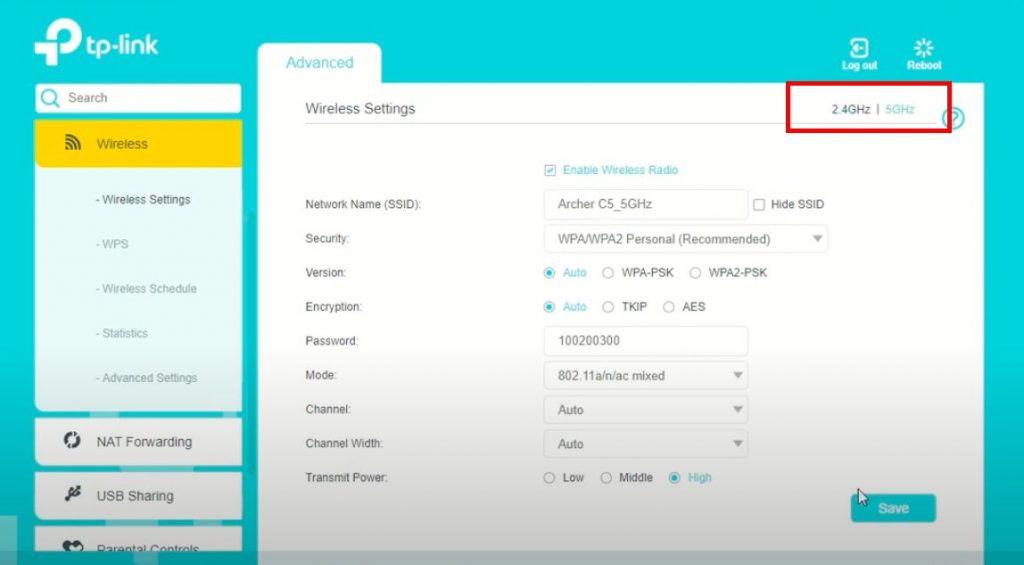
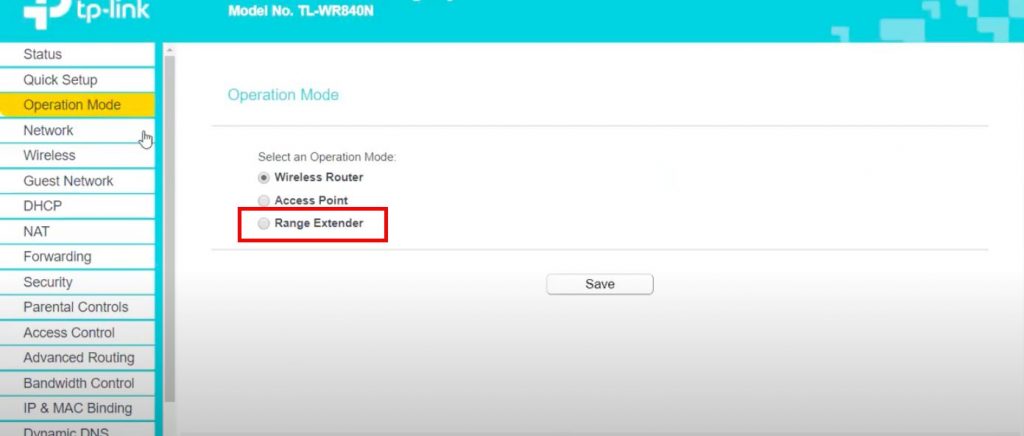
Step 7: In case the router is compatible, you will find the bridge mode, which then needs to be selected. Or else, you can search for the repeater mode, which more or less serves the same purpose.
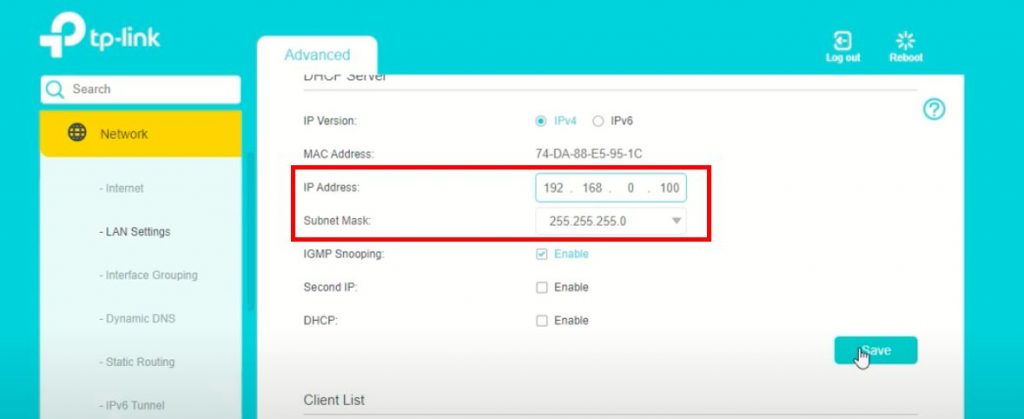
Step 8: Here comes the tricky part as you need to assign an IP address to the secondary router. However, you need to assign the IP address that falls within the DHCP (Dynamic Host Configuration Protocol) range pertaining to the primary router.
For instance, if the IP address of the first router is set at 192.168.1.1, you can assign 192.168.1.50 to the secondary unit.
Also note that the subnet mask or the IP segregation unit associated with the secondary router should be the same as that of the primary router.
Step 9: Set the secondary router name so as to better identify the same from the list of networks around.
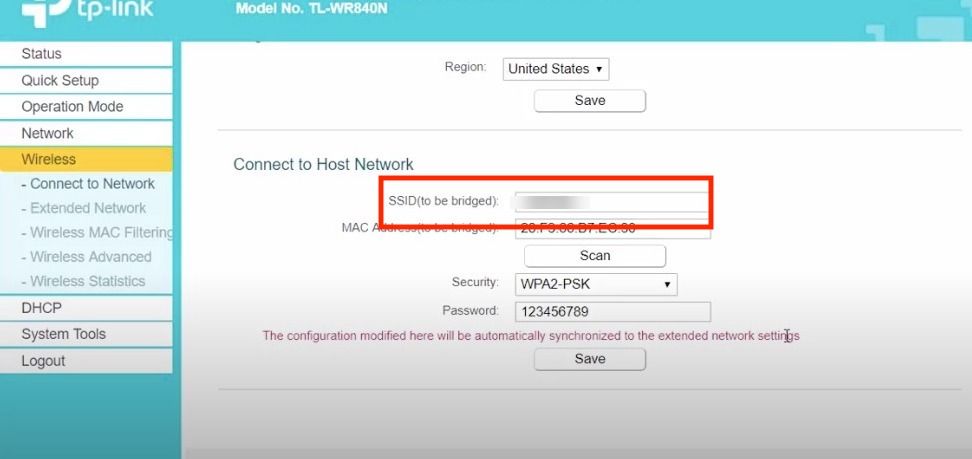
Coming to the password, ensure that both the routers feature comparable standards, with the WPA 2 (Wi-Fi Protected Access) being the first line of defense for both the devices.
Once the configuration is over, you can place the secondary router anywhere, at your convenience.
Note: If you want to get decent speeds and repeated coverage, ensure that the secondary router is effectively placed at a point where it can at least get 50 percent of the original signal strength or can maintain LoS with the primary router.
Ensure that both the routers are placed in the same channel i.e. channel 1 in this case. Change the same from the auto mode to set it as per the channel accessed by the first access point router.
Method 2: WAP-WAP
Firstly, you need to understand that an access point is more of a virtual router that feeds into the same network as the primary router. Therefore, the first access point acts as the primary router, which is then connected to the second WAP or the router in this case.
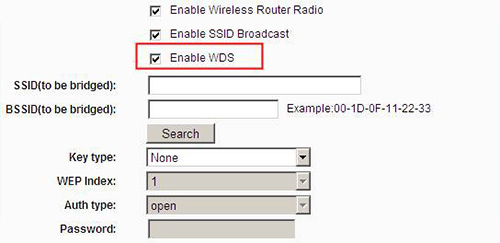
However, the first access point needs to be configured as part of the initial process but the secondary wireless access point uses the concept of WDS (Wireless Distribution System) for connecting to the first access point.
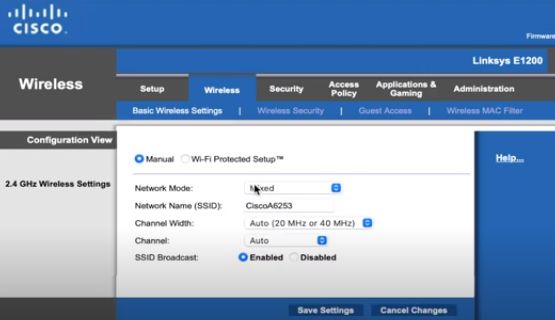
Not just that, the connections can be established as the P2P access point, P2MP Bridge, or even a repeater. However, if you plan on connecting one WAP to the other, you are more or less setting up a repeater-like ambiance for expanding the range to other wireless devices.
Note: For WDS connections to work, it is necessary to have compatible WAP devices in play. Plus, you are better off selecting the radio channels manually and keeping the device settings similar to seamlessly go about connecting the same.
Method 3: WAP Clusters
In addition to connecting a router to another router or access point, you can also go about clustering multiple WAPs for making the most of the home-bound wireless setup. Mostly, these clusters need to be configured only once and no separate reconfigurations are required.
Plus, if you invest time and money into setting up a wireless cluster, it becomes easier to increase network security and cut costs, pertaining to a wireless controller. Plus, you can easily increase the overall network range and even improve application performance.
Here is how you can set up a WAP cluster for two or more access points:
Step 1: Start configuring the SPS (Single Point Setup), which is the first access point connected to the primary router.
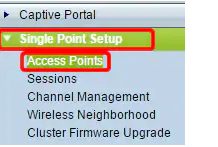
Step 2: Each device pertaining to the cluster needs to be configured with the same name as the SPS.

IP versions should be the same as clusters belonging to different IPs that wouldn’t be able to fit into the same network. However, the WDS functionality needs to be turned off for making use of clustering.
Method 4: Workgroup Bridge
Another productive and efficient way of enabling router-router connections is by working on something called the Workgroup Bridge. However, for this to work, the primary device works as the Root Access device or the ICI (Infrastructure Client Interface).
The concerned network then feeds into the Workgroup Bridge or the Access Point Interface, which can then be connected to multiple devices via Ethernet ports. The secondary router in this topology is tethered to a network switch, precisely for connecting to the LAN interface.
Compatibility Check To Connect 2 Routers
Before you can even think about connecting two routers together, either as a WAP (Wireless Access Point) cluster, workgroup bridge, or a WDS (Wireless Distribution System) powered connection comprising access points, it is essential to check the compatibility of the wireless router.
By checking compatibility I mean testing its ability to be used as a bridge. Only a router having repeater or bridge-like capabilities can be considered for working as the secondary router. However, if you are unsure, you can always look for the documentation or look up the same online, for added clarity.
Benefits Of Connecting Two Routers
There are several good reasons for connecting two Wi-Fi routers without wire. However, increased wireless coverage happens to be the most generic and prior validation. Starting from a wireless bridge to a wired access point, having multiple routing devices ensure that zero dead zones and uninterrupted wireless coverage.
Improved Capacity
Dual wireless support, via connected routers, helps increase the number of usable access points. With SSIDs (Service Set Identifiers) increasing in number, it becomes easier to connect multiple gadgets at once. This feature is especially beneficial for denser personal and professional environments, including offices, public venues, and more.
Minimal Congestion
If you are well-versed with the networking technologies and protocols, you must be able to understand that two routers, provided they have the requisite technologies and multi-stream operability, are capable of reducing network congestion.
Better Bandwidth
As the capacity is supposed to increase with two connected routers in play, you can also expect an increase in the overall bandwidth, owing to the better allocation of streams and channels.
Improved Security
Two routers can help you segment the traffic better. This means, if you can properly plan the connections, you can isolate wireless traffic better to manage and improve the security standards. Plus, if and when traffic gets segregated at the radio level, it isn’t just secure but also less interfering.
Increased Coverage
With one router, you can only get a set amount of coverage. Plus, you also need to be wary of the antenna placement. However, two routers, if and when connected, are expected to increase the coverage area, depending on the ratings and the out-of-the-box specifications.
Improved Prioritization
The most underrated aspect of connecting two routers happens to be improved traffic prioritization. However, this concept works better if you have a LAN-WAN setup in play as you can then segment and prioritize certain data packets, depending on the nature of the tasks at hand.
Conclusion
Wirelessly connected routers are pretty common in advanced home networks, as mentioned by us in a separate layout-centric discussion. However, you must understand that wireless connections are lossy and not as potent as wired or Ethernet-based setups, common to access points and switches.
Still, it is the ease of connection that makes a wireless, two-router setup, extremely resourceful and easy to implement as a part of the home network.
Chris loves technology, specifically smart home technology! With both hands-on and executive leadership experience in his corporate career, Chris stays abreast of emerging technology and solutions and immerses himself in BCCA when not in the office.
