Is your AT&T Fiber gateway limiting the potential of your high-speed internet plan? Does the coverage of the ISP-provided gateway leave dead zones in your home? Are you wanting more protection and control over your home network? In this article I assume that you have purchased a compatible router, and if not yet, refer to my list of top-rated routers for ATT Fiber.
In this article, I will walk you through with detailed instructions how to configure a third-party router to work with AT&T Fiber internet. This reconfiguration can be a little challenging given it is required that you do not use the router part of the AT&T gateway and use the modem to access the internet.
Table of Contents
How to Use Your Own Router with AT&T Fiber?
Before you get started with configuring your own router to the AT&T Fiber, it’s helpful to make sure you have everything you need ahead of time.
Requirements:
- 3rd-Party Wi-Fi router
- Activated AT&T gateway
- Ethernet cable(s)
- Power adapter
1. Connect Router to AT&T Gateway
First you will want to connect your router to the AT&T Modem-Router combo.
Step 1: Take an Ethernet cable & plug it in the Ethernet port of your AT&T gateway.
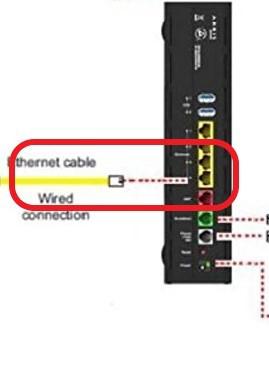
Step 2: Plug the power adapter into the router and make sure the router does not turn on. Connect the other end of the Ethernet cable to the WAN port of your third-party router.
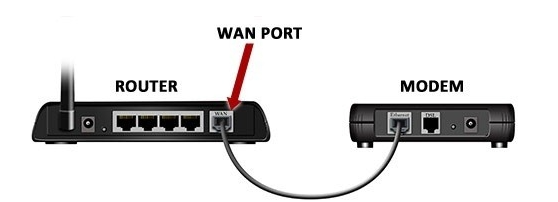
With the router and modem connected it is now time to log in and change the AT&T Gateway settings. Find the steps listed below.
2. Login to AT&T Gateway
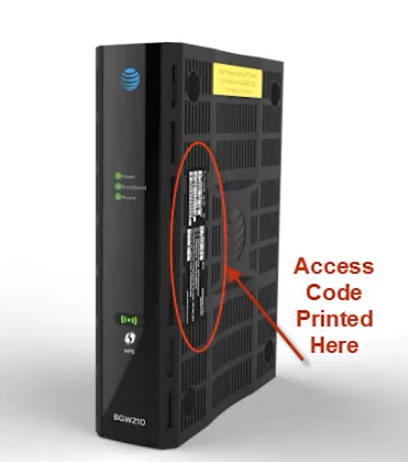
Step 1: Log in to the AT&T router admin page by logging into IP 192.168.1.254, using the device access code located on the back of your device.
Step 2: After you have logged in using the credentials, you will see the page as shown below. Click on the Firewall navigation menu.
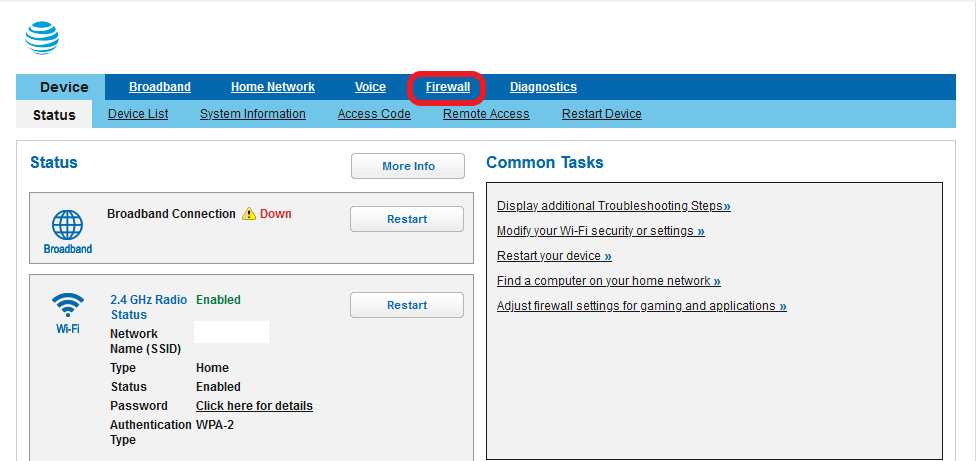
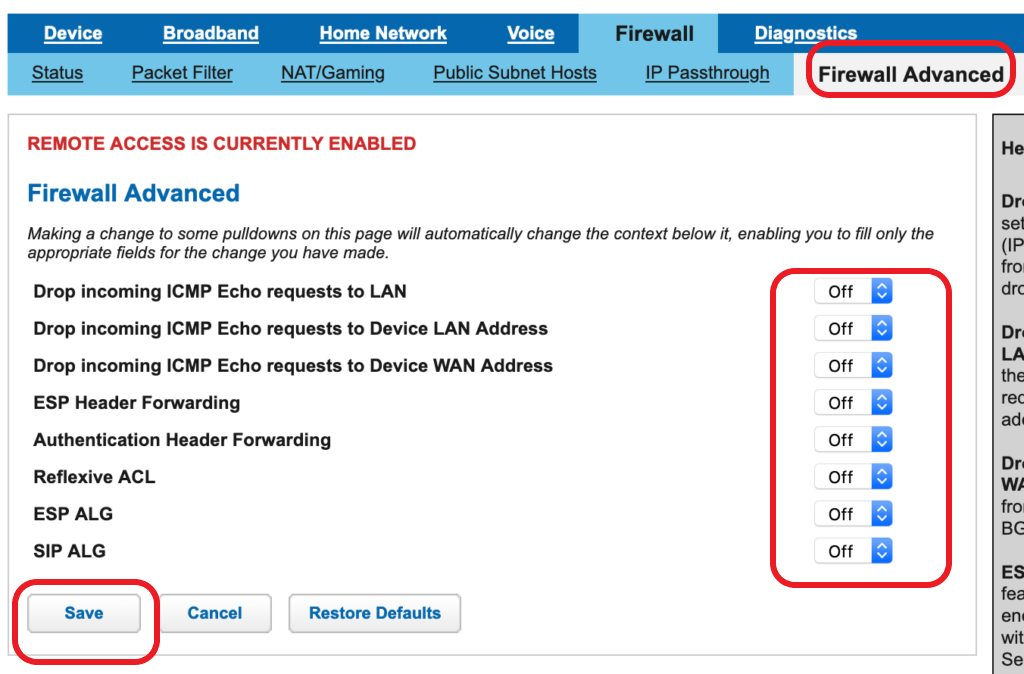
Step 3: Click on the “Firewall Advanced” menu and toggle all the settings to OFF and click save. Please note: the router’s firewall will be active once you connect it. It is safer to disable the AT&T gateway setting to avoid any conflicts.
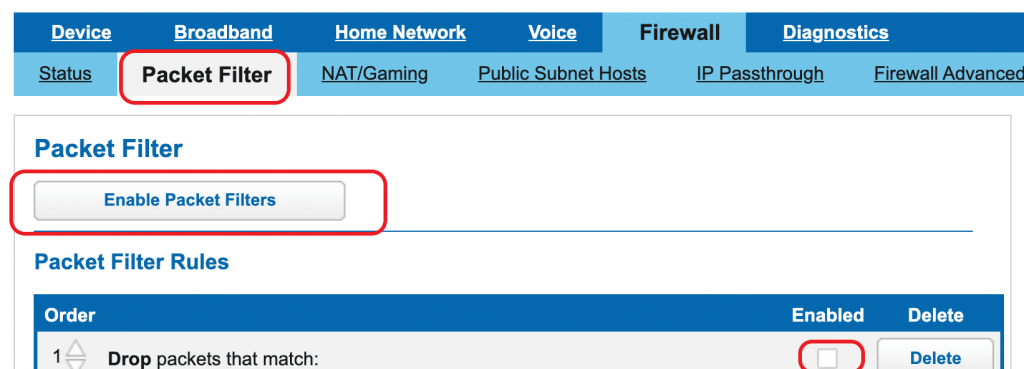
Step 4: Go to Packet filter under firewall, uncheck all the boxes in the rules section & ensure the Packet filters are disabled.
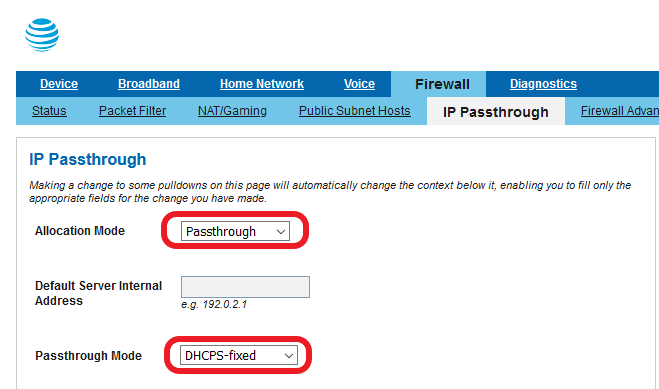
Step 5: Click on the IP Passthrough option under the Firewall menu.

Step 6: Change the allocation mode to Passthrough & Choose the passthrough mode to “DHCPS-fixed”.
Step 7: In the menu “Passthrough Fixed MAC Address ” click on the Dropdown list and identify your router.

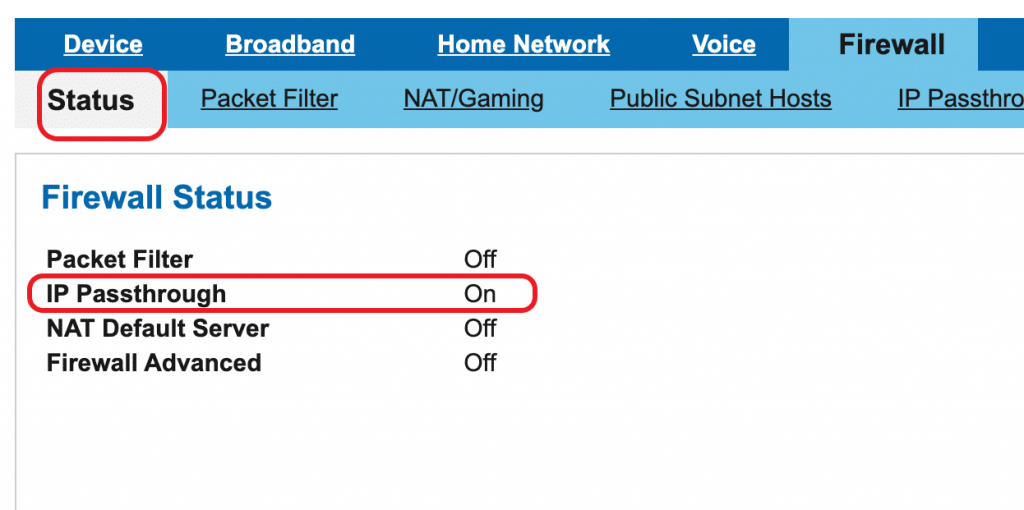
Step 8: Select your router from the list and click save. Go to the firewall status and ensure all the functions are except the IP Passthrough.
Step 9: Choose restart now from the pop-up menu. Restart your router, as well.
Step 10: Try connecting to the Wi-Fi router SSID after the LED indicators are stable.
3. Disable the AT&T Wireless Router
Disable the Wi-Fi in the AT&T login to avoid interference or confusion. Find the steps below.
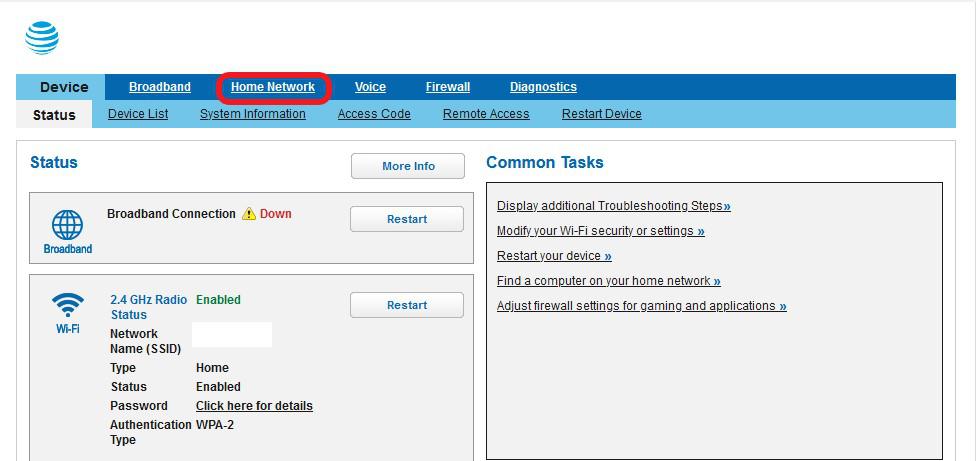
Step 1: Click on the home network on the login page.
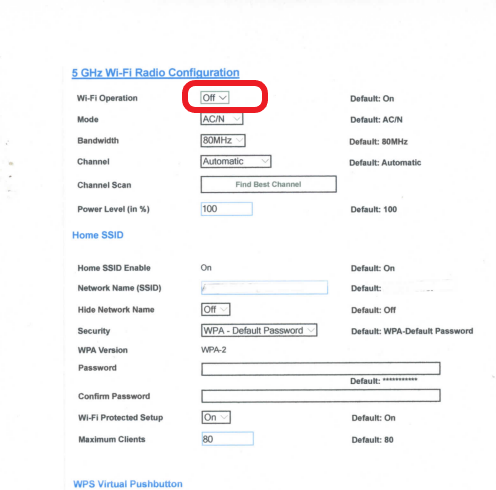
Step 2: Change the Wi-Fi operation drop-down to off in both 2.4GHz & 5GHz Radio Configuration.
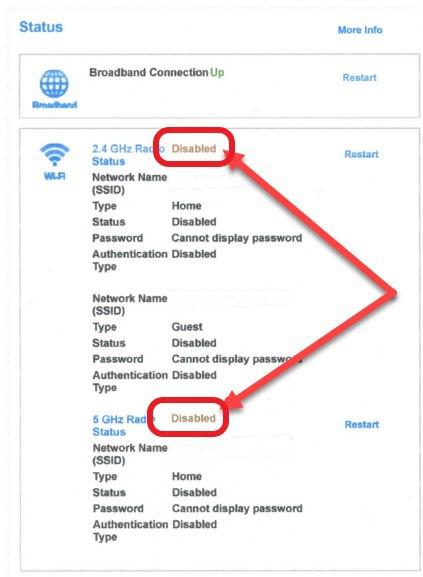
Step 3: You can verify whether the Wireless operation is disabled in the home page section.
Frequently Asked Questions
Yes, using your own router with ATT fiber is possible. If you own a router that offers improved configuration in comparison to the AT&T gateway you can turn off the ATT Wi-Fi router function in the device and use the device as a modem.
Use an Ethernet cable to connect the AT&T fiber modem to the WAN port of your router. Set the fiber modem in pass-through mode and save the setting. Restart the modem and your wireless router one after the other. The last step is to test the internet connection once the LED indicators are stable.
Yes, you can replace the AT&T equipment completely. Install a smart switch & configure its VLAN ports. Set up a VLAN by connecting your ONT, AT&T Gateway & third-party router to the smart switch. When all devices are active and turned on, and the internet indicators are stable, you can turn off the AT&T gateway and continue to use router.
Using wired Ethernet connections for the priority devices will allow more bandwidth & reduce interference. Use AT&T Smart home manager to allocate bandwidth of the essential gadgets. Use a Wi-Fi extender or a router to improve the performance & coverage.
Conclusion
With some guidance, the configuration gets done within a matter of a few minutes. You’ll be able to bring better speeds, coverage & features to your household. If you prefer, we recommend hiring an IT expert to help you with the configuration.
Chris loves technology, specifically smart home technology! With both hands-on and executive leadership experience in his corporate career, Chris stays abreast of emerging technology and solutions and immerses himself in BCCA when not in the office.
