Daisy-chaining routing is a simple concept. But it ain’t all that easy. At least not if you aren’t aware of the prerequisites. Worry not, this guide shall help you with everything in detail and easy to understand manner.
Table of Contents
Resetting the Secondary Router
The secondary router you plan on connecting to the terminal device has its own firmware and settings in place, influenced by an older connection. Therefore, it is important to reset the same by following the mentioned steps:
- Open the relevant web page on your primary computer, connect the router using the secondary cable, and type the router’s IP address, as mentioned on the box
- Follow the mentioned instructions, as laid down by the router OEM
Disabling the DHCP
DHCP or Dynamic Host Configuration Protocol is one of the more common standards that is turned on in a router by default. It assigns dynamic IPs and makes network management easier and automated. It is important to disable the DHCP function of the secondary router to make daisy-chaining easy and straightforward.
Note: In the case of a wired daisy chain setup, it becomes important to let the primary router assign IPs to the connected devices, which bears the need to disable Dynamic Host Configuration Protocol in the non-terminal routers.
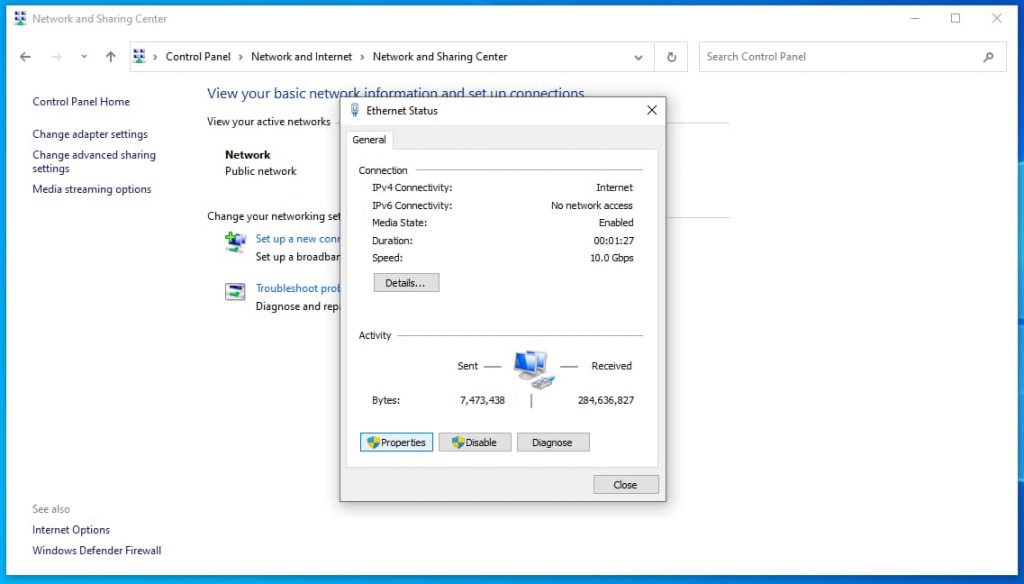
How to Disable DHCP using Windows Laptop?
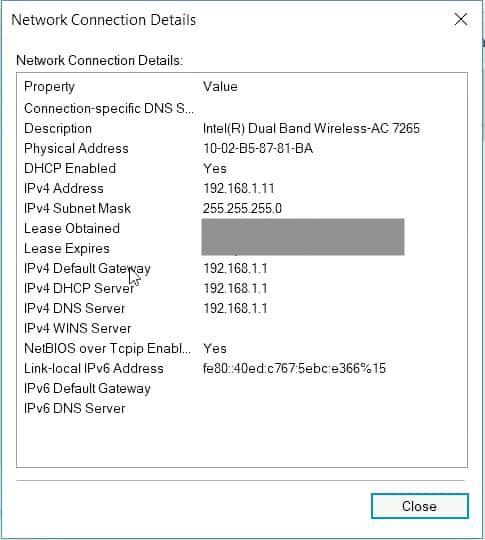
Step 1: Head over to the Network Connections and click on ‘Active Network Connection’.
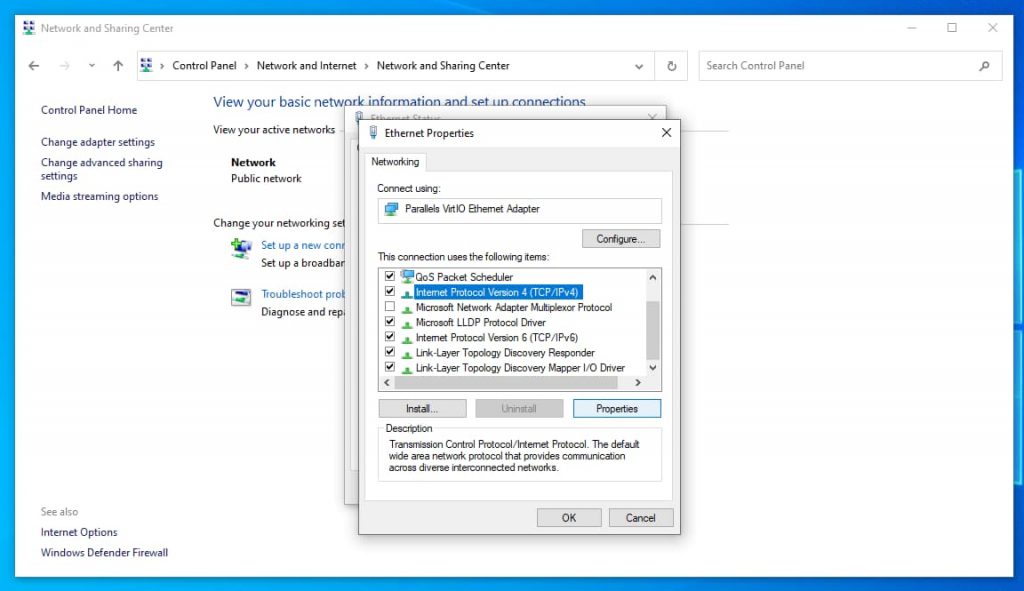
Step 2: Once open, head over to the Properties and select IPv4.
Step 3: Open IPv4 settings and select properties again.
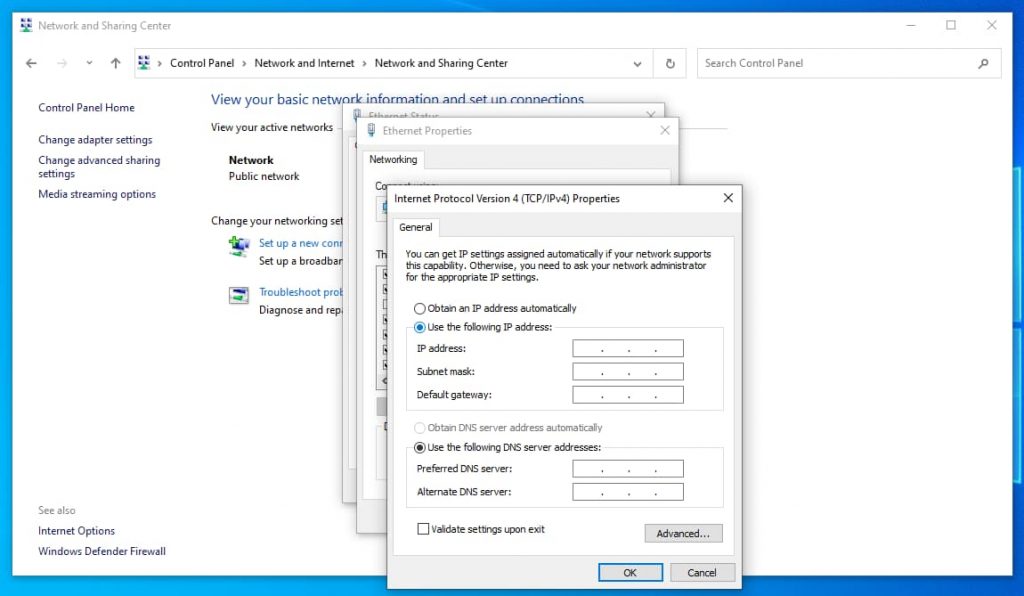
Step 4: You will now be asked to use a specific IP or rather a static IP. You need to fill in the IP address here and the subnet mask details by checking the insights associated with the primary router.
How to Disable DHCP using a MacBook?
Step 1: Head over the AirPort Utility application with the router connected to the device. For older MacBooks, you need to head over to the Network tab in Settings, Click on the Advanced tab, select the TCP/IP functionality, and click on the ‘Configure IPv4’ tab and select Manual configuration instead of the DHCP.
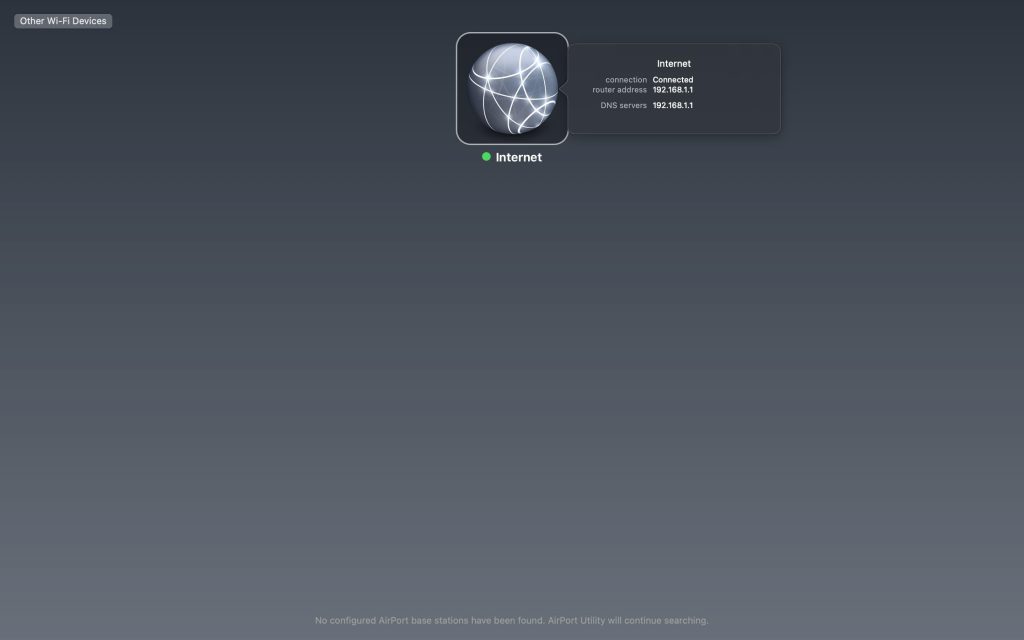
Step 2: Once open, click on the Base Station and subsequently edit the same.
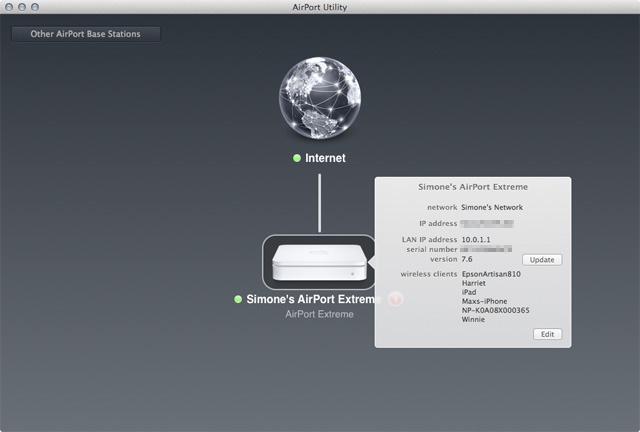
Step 3: Next, head over to the ‘Network’ tab, wait for the pop-up to appear.
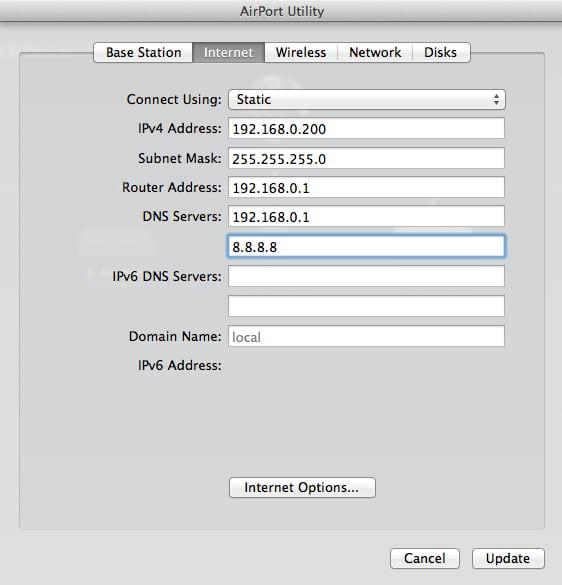
Step 4: Turn on the Bridge Mode and you are then good to go as this would automatically disable the DHCP.
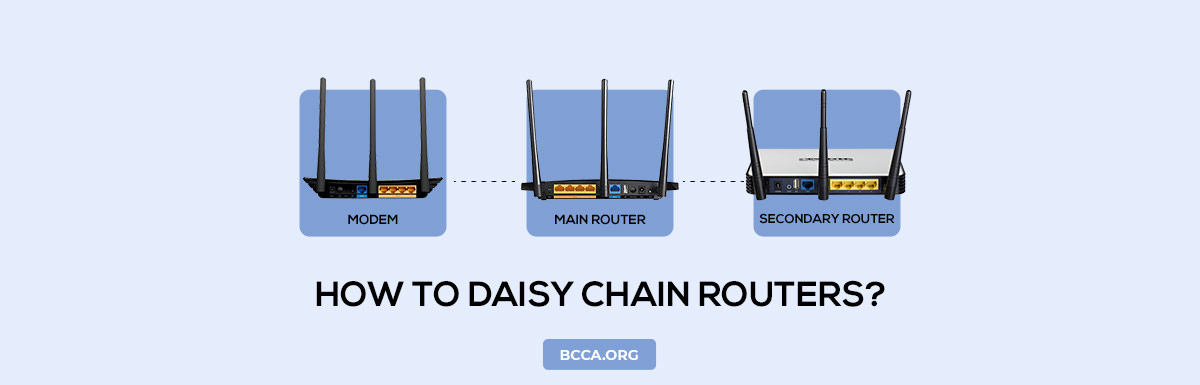
How to Daisy Chain Routers once the Prerequisites are met?
Concept
Imagine the ISP has an IP address, i.e., the source IP of 192.168.0.0. Now the ISP connecting to the first and primary router in the house is usually assigned the IP address of 192.168.0.1, owing to the home router subnet mask of 255.255.255.0.
Once you convert the source IP and subnet mask into corresponding binaries, you would realize that the static IPs of all the daisy chain routers on the list should fall between 192.168.0.1 and 192.168.0.254, including both the extremities. Only if the secondary devices follow this concept, the daisy chain becomes a success.
Step 1: Before you move ahead, keep the details of your primary router handy. You can get it from the network connection details. (These details will come in handy while configuring the secondary routers)
Step 2: Log in to your main router’s web interface. You must assign a new, static IP address to the secondary router, which eventually disables the DHCP and even ensures that the primary router recognizes the secondary device as an extension to the same network. To do so, change the IP range as shown in the screenshot below.
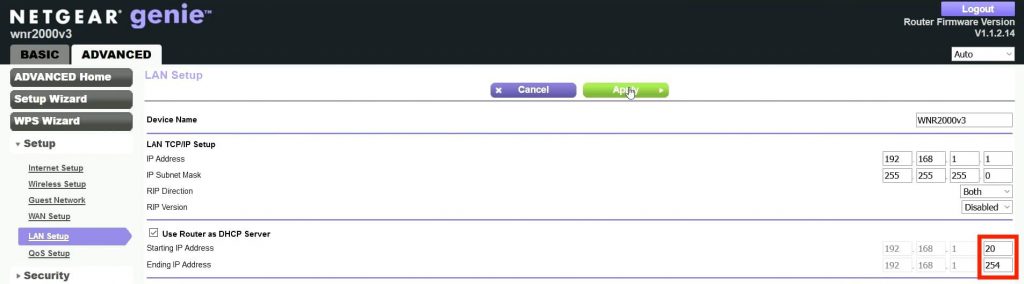
In my case, I have a Netgear router as my primary router, so, I have accessed these settings under Advanced > Setup > LAN Setup. Find similar settings for your router.
Note: For this to work, the new IP should be selected using the subnet details of the primary device. An ISP offers a network address or source IP, which is segregated and dynamically assigned and cultivated using the subnet mask of the primary device. This concept helps you allocate different IP addresses to different devices within the same network.
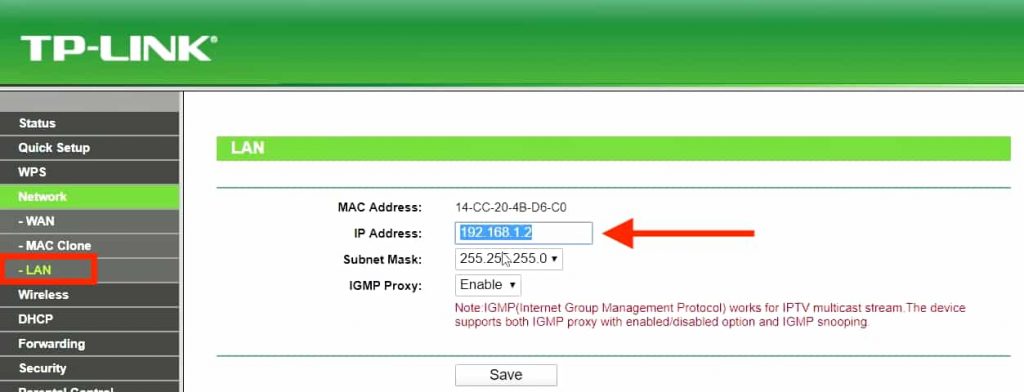
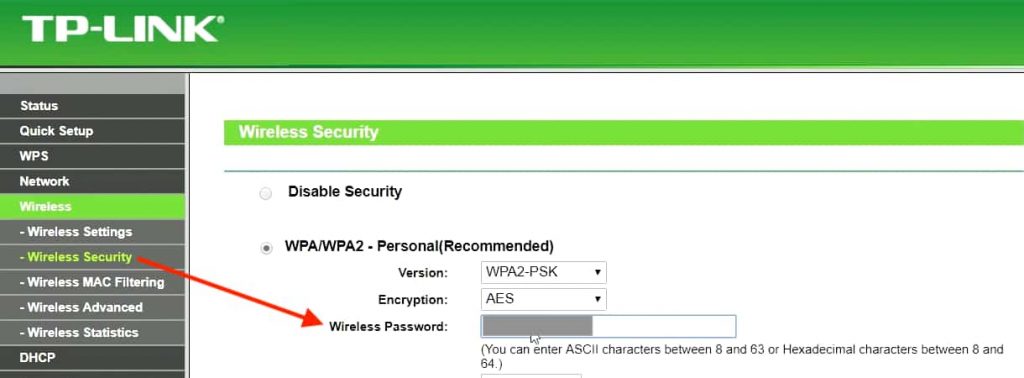
Step 3: Now login to your secondary router’s web interface and ensure DHCP Server is disabled. Next, you need to change the IP address as shown in the screenshot below.
Note: Once you have configured both the machines, ensure that two, three, or multiple daisy-chained routers are connected under the same network canopy. This can be confirmed by checking the IP of each connected device and ensuring that it aligns with the subnet mask allocated by the ISP.
Step 4: Now that the internal and IP-level configuration is taken care of, you need to establish a wired ethernet connection between the primary and the new or secondary router.
Once connected via the ethernet cable, the secondary router should pick up the settings from Router 1.
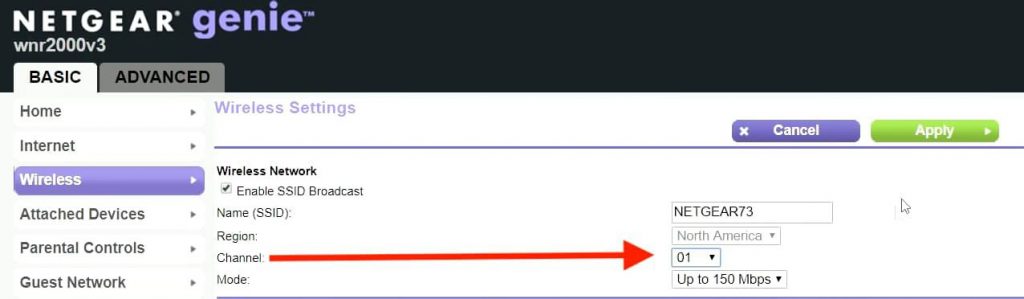
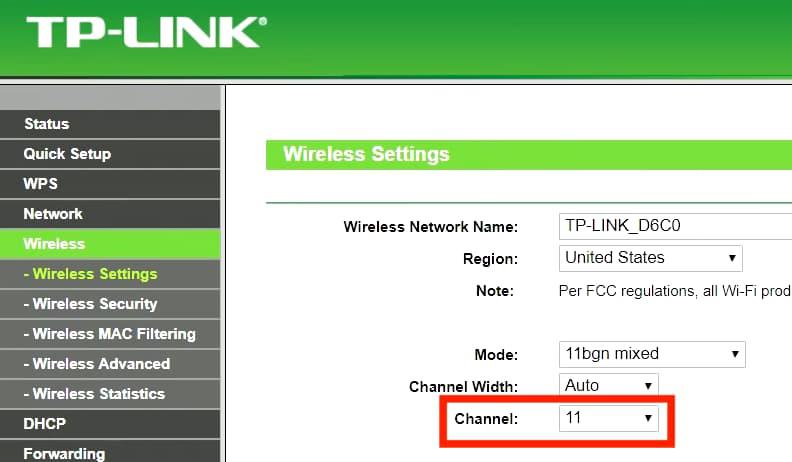
Step 5: Once connected, try and assign different non-overlapping wireless channels to the routers to minimize interference and maximize productivity. Also ensure that the security safeguards and the WLAN SSID are the same for all the participating routers.
Step 6: Set the password of the secondary router anytime now by using the static IP automatically assigned to it by Router 1.
Why should you daisy-chain routers?
Firstly, let us delve a bit deeper into the term itself, i.e., ‘Daisy Chain’, by keeping routers aside for a moment. Daisy-chaining routers is all about connecting them in a garland-like fashion or as a ring, to ensure that each connected device shares attribute with the primary one.

Daisy chaining routers can be projected as a ring network where the two terminals of a setup are connected to each other and to one other router. Or it can be part of the linear topology where terminal routers are only connected to one other router and there aren’t two-way links to account for.
Daisy Chaining multiple routers or two routers just for the sake of simplicity is aimed at extending the spread of a single network to the far-reaching segments of an establishment. Apart from that, you can daisy chain wireless routers to set up access points by starting with a wired connection. However, in this case, it becomes all the more important to take care of the DHCP capabilities of the secondary router in advance.
Well, don’t fret if you do not understand the DHCP segment yet! I will lay it all out for you in the subsequent sections.
But have I still explained the more straightforward reasons for daisy-chain routers? Not yet, I suppose. So here are the factors that can make you take the ‘Daisy-Plunge’, asap!
- To ensure streaming access in the remote corners of the house.
- To cover big offices that need VoIP setups along with standard internet services.
- To help gamers operate their consoles from any point within the house.
Conclusion
Daisy Chaining two or more routers is one of the more reliable and cost-effective strategies to extend your wireless coverage. However, for this process to work swimmingly, you must be privy to the basics of IP address, subnetting, and router resetting.
Once you understand how the concept of IP address, broadcast address (192.168.0.255), subnet mask, and Dynamic Host works, you can easily deploy any spare router as a secondary router to help you prepare a high-speed, low-latency, daisy-chain setup.
And yes, I wouldn’t leave you high and dry with these concepts and expect a detailed topic on ISP IP allocation and subnetting, anytime soon.
Chris loves technology, specifically smart home technology! With both hands-on and executive leadership experience in his corporate career, Chris stays abreast of emerging technology and solutions and immerses himself in BCCA when not in the office.